Farmhouse Wall Art- Learn How to Create 10 Best DIY Wall Art
- by Parul Yadav
- September 19, 2025
- 0
- 365

Want to transform your bedroom into a warm, cozy farmhouse retreat — but make the wall art yourself? Perfect. This step-by-step, everything-you-need guide walks you through smart, stylish, and totally doable DIY farmhouse wall art projects that fit modern farmhouse and rustic bedroom styles. You’ll get project ideas, full materials & tool lists, exact steps, sizing & hanging rules, budget options, troubleshooting tips, and styling notes so your finished pieces look pro-level.
Quick Style Cheat-Sheet (what defines modern farmhouse wall art)
- Materials: reclaimed or weathered wood, galvanized metal, linen/canvas, aged paper, wicker/baskets, botanical prints.
- Colors: neutrals first (white, cream, greige), warmed with soft greens, dusty blues, or muted earth tones.
- Texture: layers — wood grain, woven fibers, metal patina, hand-stitched textiles.
- Mood: cozy, collected, slightly imperfect — not overly themed (skip cliché signs unless they’re meaningful).
- Balance: pair rustic pieces with clean lines for a modern-farmhouse look.
Before You Start- Prep, Tools & Measurements
- Universal supplies (buy once, reuse across projects)
- Tape measure, pencil, level (4-ft level is great), stud finder
- Sandpaper (80, 120, 220), hand saw or jigsaw (for wood projects), hammer
- Electric drill + screwdriver bits, wood glue, clamps
- Painter’s tape, craft brushes, small foam rollers
- Scissors, utility knife, hot-glue gun
- Safety gear: dust mask, goggles, gloves
Materials You’ll Repeatedly Use
- Reclaimed wood/pallet wood or new pine boards
- Acrylic or chalk paints (white, black, muted blue/green, taupe)
- Stain (walnut, weathered gray) and clear matte polyurethane
- Canvas or drop cloth
- Picture hanging hardware (D-rings, picture wire, mirror clips), anchors
- Small frames, matboard, glazing (for prints)
- Galvanized tin tiles or sheet metal (optional)
Size & Placement Rules- Simple Math for Great Scale
For art above a bed, aim for art width ≈ 2/3 to 3/4 of the bed width.
Examples (calculated):
- Twin bed (39″): 2/3 × 39 = 26″ ; 3/4 × 39 = 29.25″
- Full bed (54″): 2/3 × 54 = 36″ ; 3/4 × 54 = 40.5″
- Queen bed (60″): 2/3 × 60 = 40″ ; 3/4 × 60 = 45″
- King bed (76″): 2/3 × 76 = 50.67″ ; 3/4 × 76 = 57″
- Hang art so the visual center sits around 57″ from the floor (gallery rule) — or, if above furniture, center ~8–12″ above the furniture top.
For gallery walls, allow 2–4″ spacing between frames for a tight cohesive look, and 4–8″ for looser arrangements.
Did You Know?
According to a report, reusing reclaimed or salvaged wood in DIY projects reduces demand for newly harvested lumber, which helps conserve forests and cut carbon emissions.
Top DIY Farmhouse Wall Art Projects
Below are 10 of the most beautiful, on-trend and practical farmhouse wall decor DIYs. Each includes materials, tools, steps, time, difficulty, cost range, finishing tips, variations, and hanging guidance.
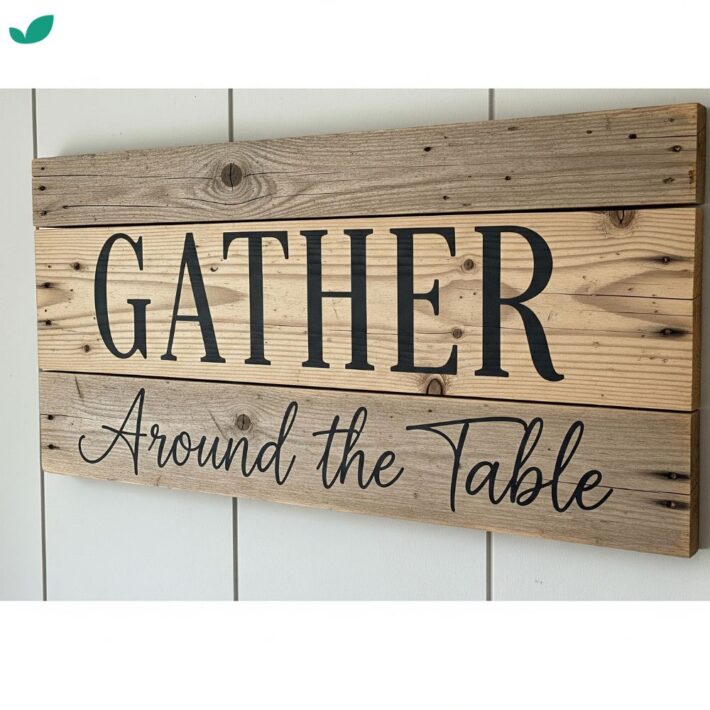
1) Reclaimed Wood Plank Sign- Modern Farmhouse Wall Art
Why
This project adds authentic farmhouse charm using simple planks. Instead of cliché slogans, you’ll create a botanical stencil, geometric shape, or simple motif that feels fresh and timeless.
Materials Needed
- 3–5 reclaimed planks (or new 1×6 pine boards), cut to your desired size
- Sandpaper (80, 120, and 220 grit)
- Wood glue
- Brad nails (or pocket screws)
- Stain (weathered gray or walnut)
- Clear matte sealer (polyurethane or polycrylic)
- Vinyl stencil or DIY paper stencil
- Chalk paint or acrylic paint (white, black, muted color)
- Painter’s tape
- Clamps (optional but recommended)
- Hanging hardware (D-rings, sawtooth hanger, or French cleat for large/heavy signs)
Step-by-Step Guide
Step 1: Build the Panel
- Lay your wood planks face down in the order you like.
- Try alternating tones or textures for a rustic look.
- Apply wood glue along the edges where planks meet.
- Clamp tightly and allow glue to set (30–45 min).
- To reinforce, nail or screw 1–2 cross battens (small boards) horizontally across the back.
- This prevents warping and keeps planks together.
Why: This creates one solid panel to work on instead of loose planks.
Step 2: Sand & Stain
- Sand the surface smooth: start with 80-grit, move to 120, and finish with 220 for a soft touch.
- Wipe dust away with a tack cloth or damp rag.
- Apply stain with a rag or brush, going with the grain.
- Quickly wipe off excess to achieve a weathered look.
- For a lighter farmhouse look: use weathered gray stain.
- For a warmer rustic look: use dark walnut.
- Let dry fully (at least 1–2 hrs).
Why: Sanding helps stain absorb evenly, and wiping excess prevents blotchy spots.
Step 3: Layout & Stencil
- Measure and mark the center of your panel with a pencil.
- Place stencil in position, secure edges with painter’s tape.
- Dip your brush or sponge lightly into paint, blot excess, then apply in thin layers.
- Use a “dry-brush” method for a rustic patina.
- Less paint = more authentic farmhouse vibe.
- Carefully remove stencil before paint fully dries.
Why: Dry brushing prevents bleeding under the stencil and gives that vintage hand-painted effect.
Step 4: Distress
- Once paint is fully dry, lightly sand edges of the stencil design with 220-grit sandpaper.
- Expose bits of wood beneath for a timeworn look.
Why: Adds authenticity so it doesn’t look too “perfect” or mass-produced.
Step 5: Seal
- Apply one coat of clear matte polyurethane with a foam brush.
- Let dry overnight.
Why: Protects the wood and paint while keeping the finish matte (glossy = not farmhouse).
Step 6: Hang
- For small/medium signs: screw D-rings into back and hang with anchors.
- For large/heavy signs: use a French cleat system for secure mounting.
Why: Prevents accidents and keeps your art flush to the wall.
Pro Tips
- Use a sponge for a softer paint effect.
- Add a thin painted border before distressing for a modern farmhouse twist.
- If you don’t have reclaimed wood, distress new pine boards by hammering lightly with nails or chains for texture.
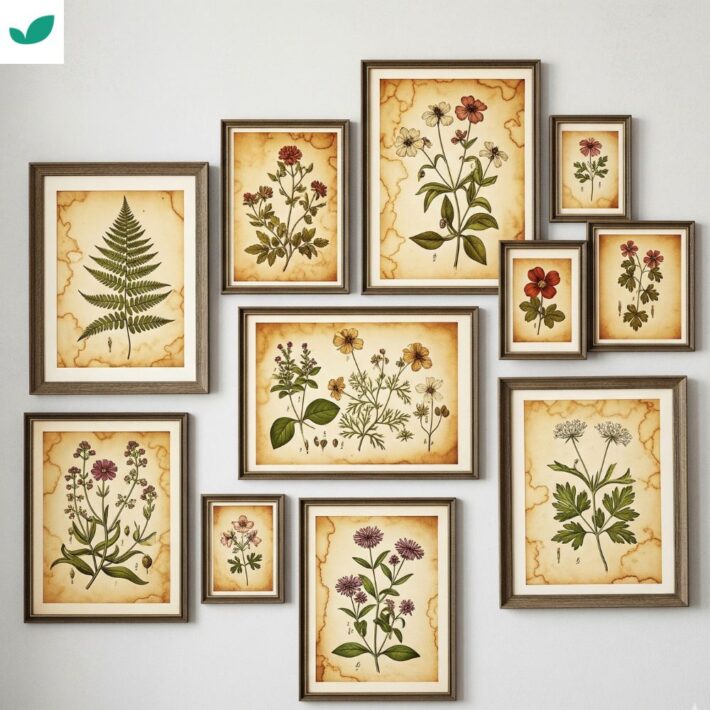
2) Framed Botanical Prints (Tea-Stained or Vintage Look)
Why
This is one of the easiest farmhouse bedroom decor ideas — simple, inexpensive, and timeless. Botanical prints fit beautifully into farmhouse home decor, whether hung in pairs, trios, or as a gallery.
Materials Needed
- Printable botanical illustrations (from free public domain sources or your own photography)
- Heavy paper (100–140 gsm recommended)
- Tea bags or instant coffee (for staining effect)
- Frames with mats (thrifted or new)
- Acid-free tape or mounting squares
- Iron (optional, for flattening paper)
- Optional: glass or plexiglass for protection
Step-by-Step Guide
Step 1: Print Your Art
- Choose botanical images (ferns, flowers, herbs, vintage illustrations).
- Print on sturdy paper so it holds stains and doesn’t wrinkle badly.
- Size to match your mat opening (e.g., 8″x10″).
Why: Thin paper tears or warps when stained — heavier paper holds up better.
Step 2: Tea/ Coffee Stain (Optional for Vintage Look)
- Brew a strong cup of tea or coffee.
- Place printed page on a baking tray.
- Brush or dunk page lightly in tea/coffee.
- Remove quickly and lay flat on parchment paper to dry.
- For deeper tones, repeat once dry.
- Iron gently on low heat (no steam) to flatten.
Why: This creates an antique patina so your art feels aged and authentic.
Step 3: Mount Your Art
- Open your frame and remove the backing.
- Place mat on top of print, center image, and secure with acid-free tape.
- Trim excess paper if needed.
Why: Mats add polish and make prints look professional.
Step 4: Frame & Hang
- Place mounted art into a frame with backing.
- Add glass/plexiglass for protection (optional).
- Secure with frame tabs.
- Add hanging hardware (D-rings, sawtooth, or hanging strips for lightweight frames).
Why: Framing elevates a simple print into a finished farmhouse wall art piece.
Variations
- Use pressed real leaves or flowers instead of prints for a dimensional effect.
- Create a set of 3–4 prints for above the bed.
- Use mismatched thrifted frames, all painted in one color (matte black or distressed white) for a collected farmhouse gallery.

3) Curated Gallery Wall (Frames + Baskets + Small Mirrors)
Why
A gallery wall instantly makes your bedroom feel lived-in and personal. By mixing frames, woven baskets, and mirrors, you create texture + story + farmhouse charm in one display.
Materials
- Mix of frames (different sizes, finishes)
- Woven baskets (flat or shallow)
- Small mirrors or art prints
- Kraft paper or newspaper for templates
- Painter’s tape
- Measuring tape + level
- Picture hooks and wall anchors
Step-by-Step Guide
Step 1: Plan the Layout on the Floor
- Gather all pieces and lay them out on the floor.
- Start with the largest piece as your anchor (usually center or slightly off-center).
- Build outward with medium pieces, finishing with small accents.
Why: Arranging on the floor first lets you visualize without damaging walls.
Step 2: Make Wall Templates
- Trace each frame/basket/mirror on kraft paper.
- Cut out paper shapes.
- Tape templates onto the wall with painter’s tape.
- Step back and adjust until the spacing feels balanced.
Why: The template method saves you from extra nail holes.
Step 3: Mark & Hang
- On each paper template, mark the top center point where the nail/hook will go.
- Use a level to keep rows straight.
- Hammer in hooks/anchors at the marked points.
- Hang each piece, then peel away the paper template.
Hanging Tips
- Keep artwork centers around 57″–60″ from the floor (eye level).
- Mix textures: wood frame + wicker basket + mirror = farmhouse dimension.
- Odd numbers (3, 5, 7 pieces) often look best.
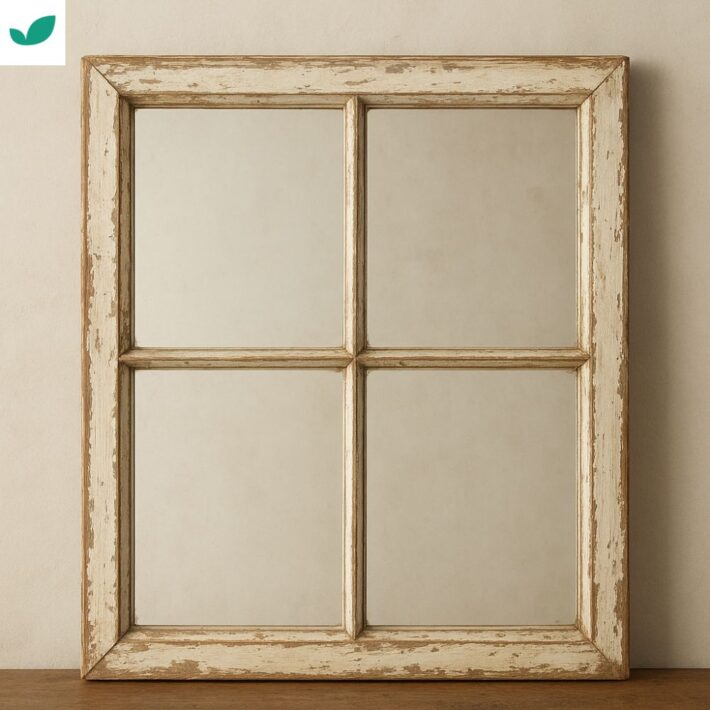
4) Old Window Frame Mirror / Photo Frame
Why
Old windows turned into mirrors or frames bring instant rustic charm. Perfect above a dresser or as a headboard focal point.
Materials
- Salvaged or reproduction window frame
- Mirror cut to size (from a glass shop) OR mirrored acrylic sheet
- Mirror adhesive OR mirror clips + backing board
- Sandpaper, paint or stain
- Distressing tools (sandpaper, hammer, steel wool)
- Hanging hardware rated for the frame’s weight
Step-by-Step Guide
Step 1: Prep the Frame
- Remove old glass panes (if any). Wear gloves for safety.
- Sand the frame smooth to remove peeling paint.
- Paint or stain in farmhouse colors (whitewash, distressed black, walnut brown).
- Optional: distress edges with sandpaper for a timeworn look.
Step 2: Install the Mirror
- Cut mirror to fit at a local glass shop (safest option).
- Lay the mirror against a backing board inside the frame.
- Use strong mirror adhesive or small mirror clips to secure.
Why: Adhesive alone works for light pieces; use clips for heavy glass.
Step 3: Seal & Hang
- Attach sturdy D-rings or a French cleat system to the back.
- Hang onto wall studs or use heavy-duty anchors.
Safety Tip: Never cut glass at home unless trained — leave it to professionals.
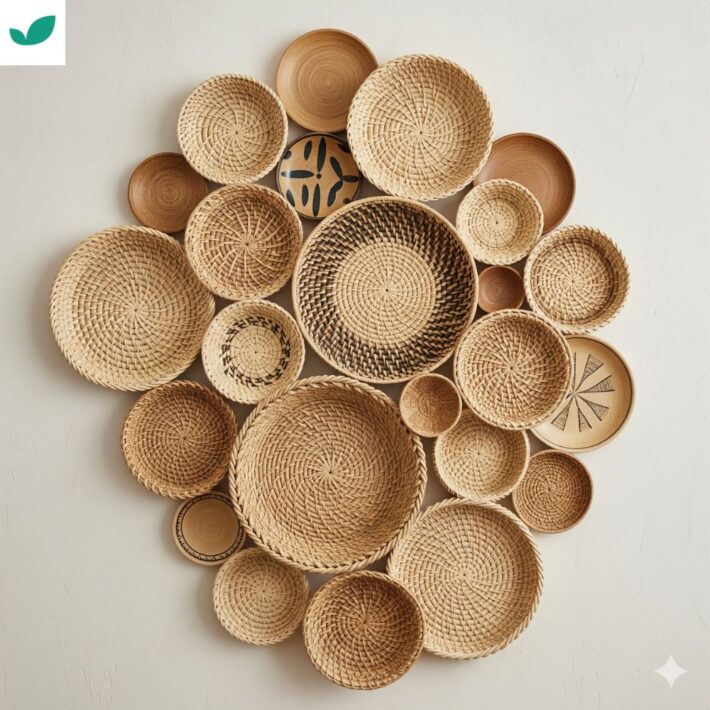
5) Woven Basket Wall Cluster
Why
Baskets bring warmth, texture, and farmhouse authenticity. Lightweight and affordable, they’re great solo or mixed into a gallery wall.
Materials
- Assorted woven baskets (different sizes, shapes, depths)
- Small nails, picture hooks, or adhesive disc hangers
- Kraft paper + painter’s tape (optional for layout)
Step-by-Step Guide
Step 1: Arrange on the Floor
- Lay baskets flat on the floor.
- Try clusters of 3, 5, or 7 for visual balance.
- Mix shallow + deep baskets for depth.
Step 2: Optional Templates
- Trace each basket onto kraft paper.
- Tape onto the wall to test placement.
Step 3: Hang
- Insert small nails or hooks at marked spots.
- Hang baskets through woven gaps or rims.
- Step back, adjust as needed.
Pro Tip: Flip one basket inside out to expose the inner weave — adds variety.
Did You Know?
EPA highlights that reusing building materials like windows, doors, and wood frames helps divert waste from landfills while saving energy that would otherwise go into producing new materials.

6) Pallet-Wood Silhouette (Barn, Rooster, or Other Farm Motif)
Why
Classic farmhouse imagery (barns, roosters, cows) looks striking in silhouette form. When done with restraint, it feels rustic but not kitschy.
Materials
- Pallet boards (or new pine boards)
- Sandpaper
- Wood stain (gray or brown)
- Black/charcoal matte paint
- Varnish/sealer
- Jigsaw (if cutting shapes out)
- Projector or graphite paper for transferring the design
Step-by-Step Guide
Step 1: Build the Panel
- Follow the same method as Project 1 (Reclaimed Wood Sign).
- Glue planks, reinforce with battens, and sand lightly.
Step 2: Transfer the Silhouette
- Print a silhouette (barn, rooster, windmill, cow).
- Use graphite paper or a projector to trace onto the wood panel.
Step 3: Paint the Design
- Fill in the outline with matte black or charcoal paint.
- Use steady strokes, staying just inside lines.
- Let dry fully.
Step 4: Distress & Seal
- Lightly sand the edges of the paint to reveal wood underneath.
- Apply one coat of matte varnish or polycrylic.
Variation: Reverse silhouette → paint the background and sand back to reveal the natural wood as the shape.
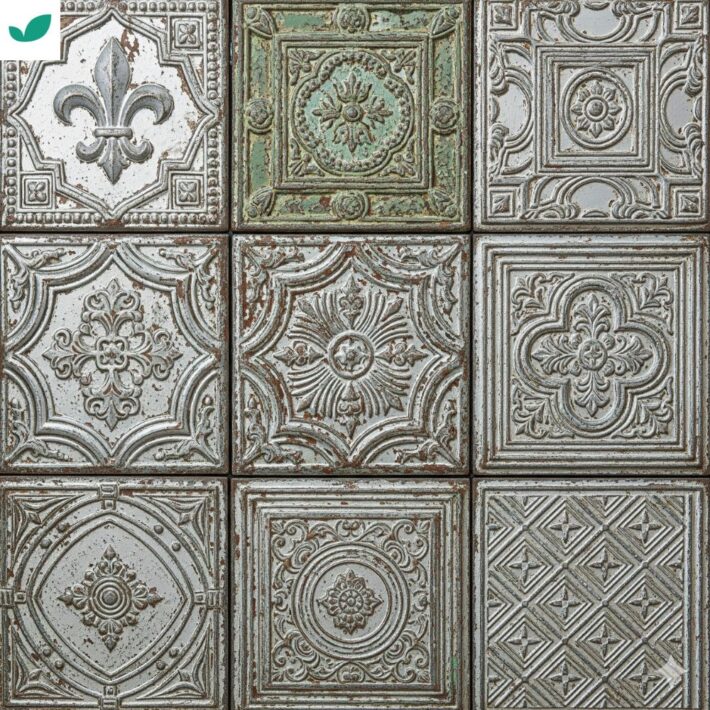
7) Rustic Metal Wall Tiles (Aged Tin Look)
Why
Farmhouse style isn’t just wood — mixing in metal textures brings that modern-industrial edge. Rustic tin-look tiles give your walls instant character and a vintage vibe.
Materials
- Tin ceiling tiles or lightweight sheet metal
- Metal snips
- File (to smooth edges)
- Rust effect spray paint kit OR patina paints
- Clear matte sealer
- Thin plywood backing (optional)
- Screws + washers OR strong metal adhesive
- Gloves + goggles
Step-by-Step Guide
Step 1: Cut Tiles to Size
- Use tin snips to cut tiles to the size you want.
- File edges smooth to avoid sharp burrs.
Why: Safety and clean edges matter before finishing.
Step 2: Create the Patina
- Apply rust-effect spray paint or patina paints in light layers.
- Mist with water or vinegar (if product allows) for more organic aging.
- Always test on a scrap first for the look you want.
Why: Thin layers look more authentic than one heavy coat.
Step 3: Mount Tiles
- For a large piece: attach tiles to thin plywood with adhesive.
- For singles: use screws and washers for an industrial look.
Step 4: Seal & Hang
- Spray with clear matte sealer to lock in the patina.
- Hang with heavy-duty anchors or studs.
Safety: Always wear gloves + goggles when cutting or sanding metal.
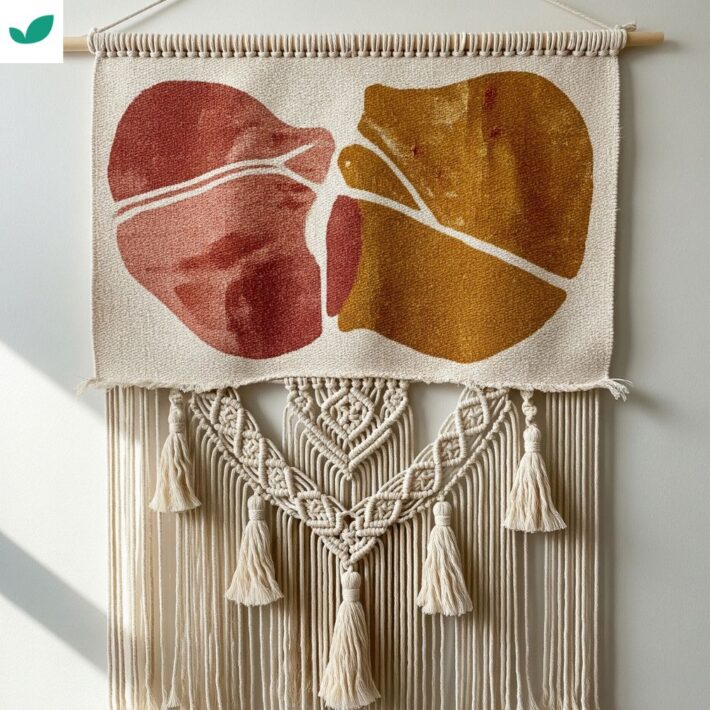
8) Textile Wall Hanging (Canvas or Macramé)
Why
Textiles soften all the rustic wood/metal textures in farmhouse design. A painted canvas hanging or macramé piece adds warmth and handmade charm.
Materials
- Canvas or drop cloth
- Wooden dowel or branch
- Jute rope/twine
- Acrylic paint or fabric dye
- Brushes, sewing supplies
- (Optional) Macramé rope/yarn
Step-by-Step Guide (Painted Canvas)
Step 1: Cut & Prep
- Cut canvas to desired size.
- Fold and sew (or hot-glue) a pocket at the top edge for your dowel.
Step 2: Design & Paint
- Sketch your motif: stripes, leaves, or a big simple shape.
- Use watered-down acrylics for a soft, farmhouse wash effect.
Let dry completely.
Step 3: Hang & Style
- Thread the dowel through the top hem.
- Tie the jute rope to the dowel ends for hanging.
Variations
- Add macramé fringe at the bottom.
- Attach leather tassels for a rustic-modern mix.
- Do full macramé instead of painting (advanced).
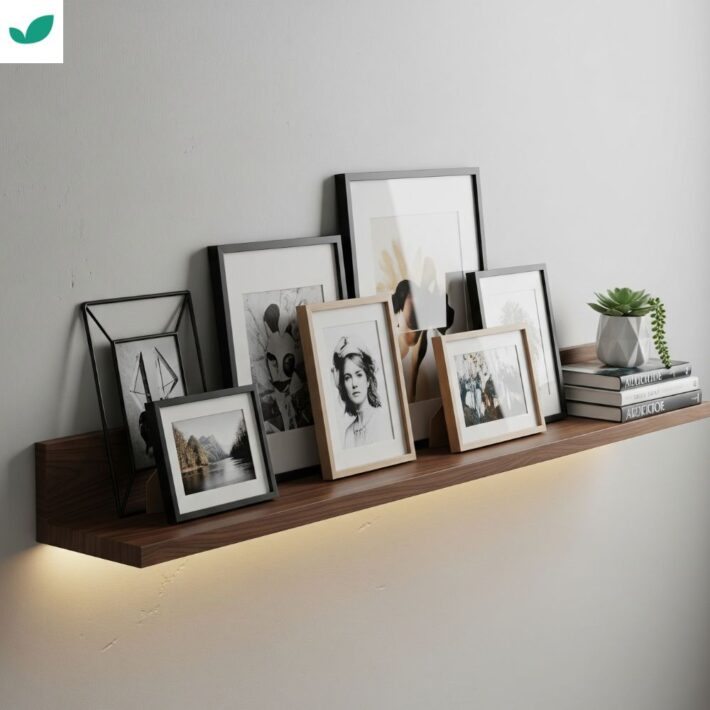
9) Floating Picture Ledge
Why
A picture ledge is versatile: you can swap art seasonally without rehanging. Perfect for modern farmhouse bedrooms where you might rotate family photos, botanical prints, or rustic signs.
Materials
- 1×4 wood strip cut to length
- Smaller strip for front lip (optional)
- Wood glue + brad nails
- Stain or paint + sealer
- Screws, wall anchors, and level
Step-by-Step Guide
Step 1: Build the Ledge
- Glue/nail the small strip (lip) to the front of your 1×4 board.
- This prevents frames from sliding off.
Step 2: Finish
- Sand edges smooth.
- Stain or paint in farmhouse finishes (weathered gray, whitewash, walnut).
- Seal with matte polyurethane.
Step 3: Install
- Use a stud finder to locate studs.
- Screw directly into studs or use wall anchors for weight support.
- Check with a level to keep straight.
Step 4: Style
- Lean frames, prints, or even small baskets.
- Stack multiple ledges vertically for a farmhouse gallery wall effect.
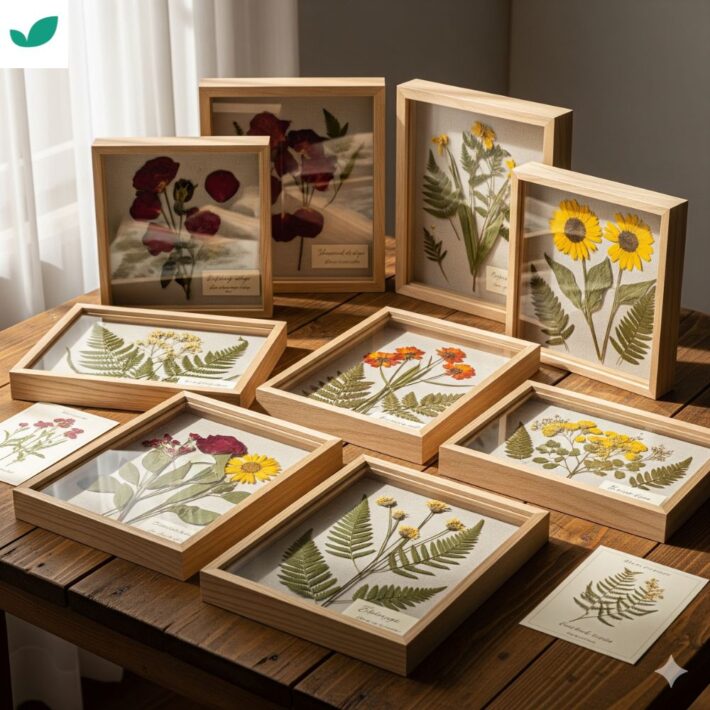
10) Pressed Botanical Shadow Boxes
Why
Botanicals tie farmhouse bedrooms to nature and the seasons. Pressed leaves or flowers in shadow boxes look elegant, calming, and timeless.
Materials
- Fresh flowers/leaves
- Heavy books OR a plant press
- Blotting paper or parchment paper
- Shadow box frames
- Acid-free glue dots or mounting squares
Step-by-Step Guide
Step 1: Press Botanicals
- Place leaves/flowers between two sheets of blotting paper.
- Layer inside a heavy book or press.
- Add weight on top.
- Leave for 1–3 weeks until dry and flat.
Tip: Change paper every few days to prevent mold.
Step 2: Arrange in Shadow Box
- On the backing board, lay out your botanicals.
- Attach gently with acid-free glue dots (prevents discoloration).
Step 3: Seal & Display
- Close the shadow box carefully.
- Hang solo or as a grouped set above a bed or dresser.
Pro Tip: Use local or seasonal plants for a personal farmhouse connection.
Hanging Heavy Art- Safety & Hardware Guide
Light pieces (<8–10 lb): adhesive picture hooks (follow manufacturer’s weight specs) or a single small nail.
Medium pieces (10–40 lb): use wall anchors or toggle bolts; better to screw into studs if possible.
Large/heavy pieces (>40 lb): mount directly to studs with lag bolts or use a French cleat system. If in doubt, hire a pro.
Picture wire: when using wire, attach to D-rings and angle the wire down so the art sits tight to the wall.
Stud finders: use them; double-check with a small pilot drill rather than relying solely on the tool.
Finishing, Protection & Maintenance
- Seal wood with a matte polyurethane to prevent dust soak and ease cleaning.
- Avoid direct sunlight for paper prints — use UV-protective glazing if sun exposure is likely.
- Dust regularly using a microfiber duster; for metal, wipe gently with a damp cloth and dry quickly to avoid rust.
- If using live plants, ensure proper wall watering methods (self-watering pockets or wall planters that can be removed for watering).
Budget Paths (realistic ideas)
Budget under $50: Botanical prints in thrift frames, small basket cluster, painted canvas, DIY stencil sign with scrap wood.
Mid-range $50–$200: Reclaimed wood plank wall art, shadow boxes with pressed botanicals, custom metal patina tiles.
Higher end $200+: Professionally cut mirror into window frame, large custom reclaimed-wood panels, multiple framed vintage prints.

Common Mistakes & How to Avoid Them
- Too small for the wall: Use the 2/3–3/4 bed width rule and the 57″ visual center.
- Hanging too high: Keep centers at eye level or just above furniture.
- Overcrowding: Start sparse; you can always add more.
- Ignoring weight & anchors: Heavy pieces need studs/anchors — don’t risk drywall failures.
- Too many trends: Stick with a neutral base and 1–2 accent colors or textures for longevity.
Styling Combos- Quick Ideas
Over a white shiplap headboard: pair a wide reclaimed plank sign (40–45″) with two small botanical frames on either side.
Above a dresser: create a gallery with a mirror, botanical art, and one woven basket.
Small bedroom: Use vertical stacked ledges with rolled quilts and a single tall framed print to save floor space.
FAQs:
Q: Can I make farmhouse wall art in an apartment?
A: Absolutely. Focus on lightweight pieces (framed prints, canvas, woven baskets) and use picture-hanging strips if you can’t drill.
Q: What’s a good beginner project?
A: Framed botanical prints or a painted canvas. Both are cheap, fast, and high-impact.
Q: How do I make my art look “modern farmhouse”?
A: Keep a neutral palette, use a clean frame or ledge, and pair rustic textures with simple shapes — avoid clutter and kitschy signs.
Q: Where to source reclaimed wood or vintage frames?
A: Local salvage yards, flea markets, thrift stores, or online marketplaces. Small art & craft stores also sell pallet boards and new distressed wood.
Conclusion
Transforming your space with farmhouse wall art ideas doesn’t require a big budget—just creativity, reclaimed charm, and thoughtful DIYs. From rustic wood to cozy textiles, these wall art projects bring timeless warmth and modern farmhouse elegance into your home.